 Home
Your kiosk is here
Set up your kiosk.
Twelve steps. Start at the top or jump to one.
01Location
Let's decide where you're going to put it.
Pick the spot before you open the crate. It needs:
- Connectivity. Decent Wi-Fi signal where it stands. Check it on your phone for now; once the software's on, the kiosk tests its own signal.
- Power. One outlet within reach of the cord.
- A good place to line up. Visible from where fans arrive, off to the side of your normal flow so the kiosk line doesn't block the gate. The base is 20″ × 22″; it stands 70″ tall.
- Out of the weather. Under a roof or an awning. The cabinet is weather-resistant, not weatherproof — a light sprinkle is fine, a soaking isn't.
- Not facing the sun. Glare makes the screen unreadable, and direct sun can overheat the tablet until it shuts itself off. Point it north or into shade.
No roof at the gate? A 5×5 pop-up tent solves shade and rain in one go. Stake it down.
Learn more02Unbox
Cut the straps. Stand it up.
Ships lying down. Two people to stand it, a hand truck to move it.
- Cut the straps and lift the lid. Keep the crate — it's the box it goes home in.
- Stand it up. One person at the top, one at the base. Walk it upright.
- Level it. Leveling feet on the base. Turn them until it doesn't rock.
In the crate
About those keys: we don't have spares. Get a copy cut this week and decide who holds each one.
Learn more03Antenna
Screw on the antenna.
Without it the kiosk can't hold a signal.
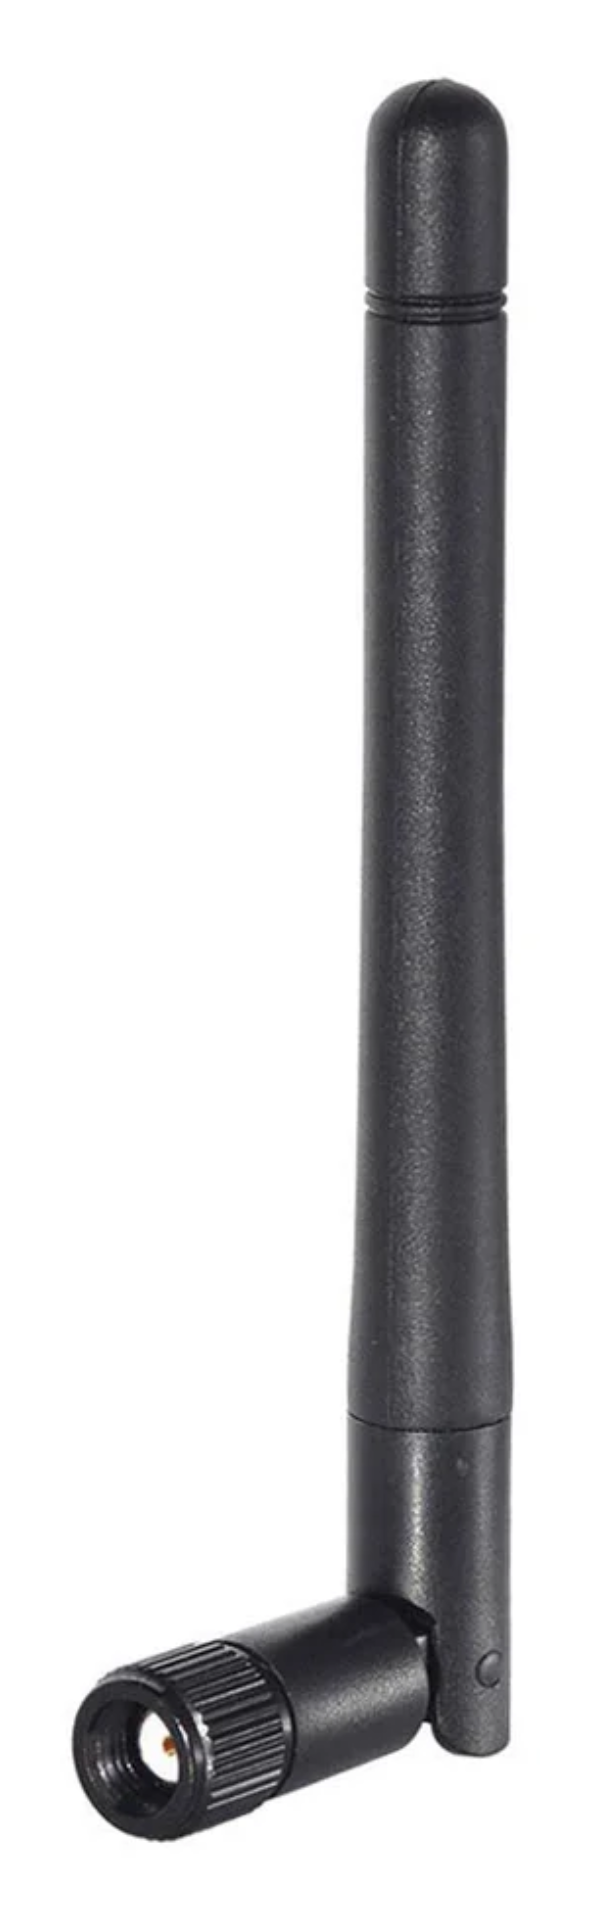
Screws onto the post
- 1It ships loose in the crate. Find the threaded post on the back, upper right.
- 2Screw it on hand-tight only and point it straight up. Don't force it and don't lean on it — snap that post and the kiosk can't get online. There's no field fix.
- 3Lost it? Any RP-SMA male Wi-Fi antenna fits. We recommend this 2-pack on Amazon — under $10, usually next day.
04Power
Plug it in.
Open the door with the key. The power board is inside, bottom left.
- 1Plug the cord into the three-prong socket on the back of the power board.
- 2Feed the cord out through the notch in the bottom of the cabinet, lower left. That's the only way out — the door closes flat over it.
- 3Flip the lighted rocker switch on. It glows when it has power.
- 4Plug into the wall. The screen lights in about a minute. (Once the software is installed, Kiosk opens by itself about 30 seconds after the tablet comes on.)
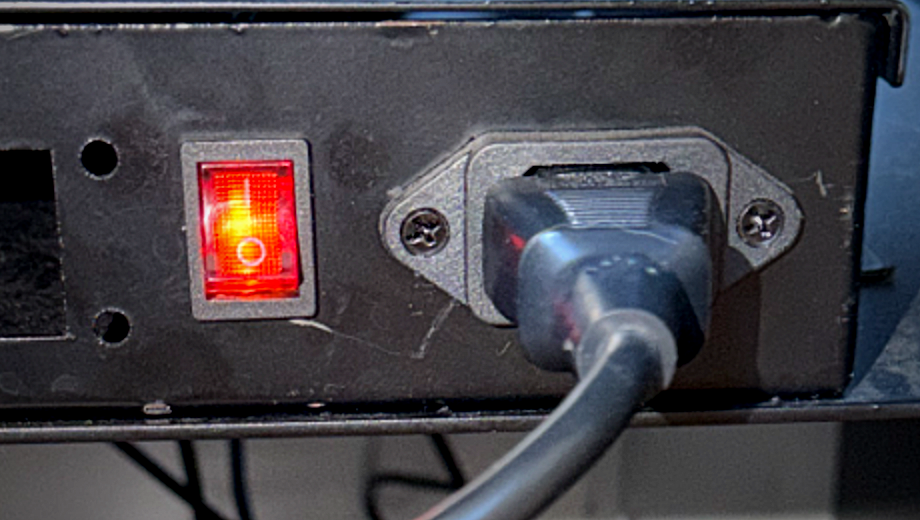
Rocker lit, cord seated. Leave it like this.
- 5Leave the rocker switch on forever — you shouldn't need it again. Plugging into the wall starts it. To stop: swipe up from the bottom edge, tap the power icon at the far right of the Android bar, Power off, wait for the scanner light to go out, then unplug.
- 6The cord is 6 ft. Farther than that from an outlet? Use a heavy-duty outdoor extension cord (12-gauge), not a household one.
- 7Route the cord where nobody walks.
05Wi-Fi
Get it online.
After boot: the Android home screen. Four taps to Wi-Fi.
Six screens — swipe or use the arrows
Home screen
 Explorer
 Lightning
All apps
Settings
Pick your network
Type the password
Connected. You're done.
Then it's four taps:
- 1Track Wi-Fi or a phone hotspot — either works. Whatever it is, give the kiosk its own network name and a plain password.
- 2Router within 30 ft, up high, with nothing metal between it and the kiosk. Where the router goes.
- 3Write the network and password on a sticker and put it inside the door. Keep it handy at the gate.
- 4Signal strength gets checked properly after login — tap the signal badge on any kiosk screen. How to read it.
 Wi-Fi at the track rarely reaches the pit gate.Even tracks with solid Wi-Fi in the tower or concessions often have nothing where the kiosk sits. Starlink is the most reliable fix we've seen.Learn more
06Browser
Open the browser.
On the home screen, tap the lightning bolt.
Lightning — the browser
- 1It's on the home screen. Don't see it? Swipe up from the bottom for all apps.
- 2Tap the address bar at the top and type kiosk.pitpay.com/download
07Software
Download it.
Type this in the address bar
Tap Download Kiosk Software. The page walks you through the eight taps to install. Kiosk opens on its own.
See the download page08Wristbands
Load your bands.
Rolls are 500. Two printers, two rolls.
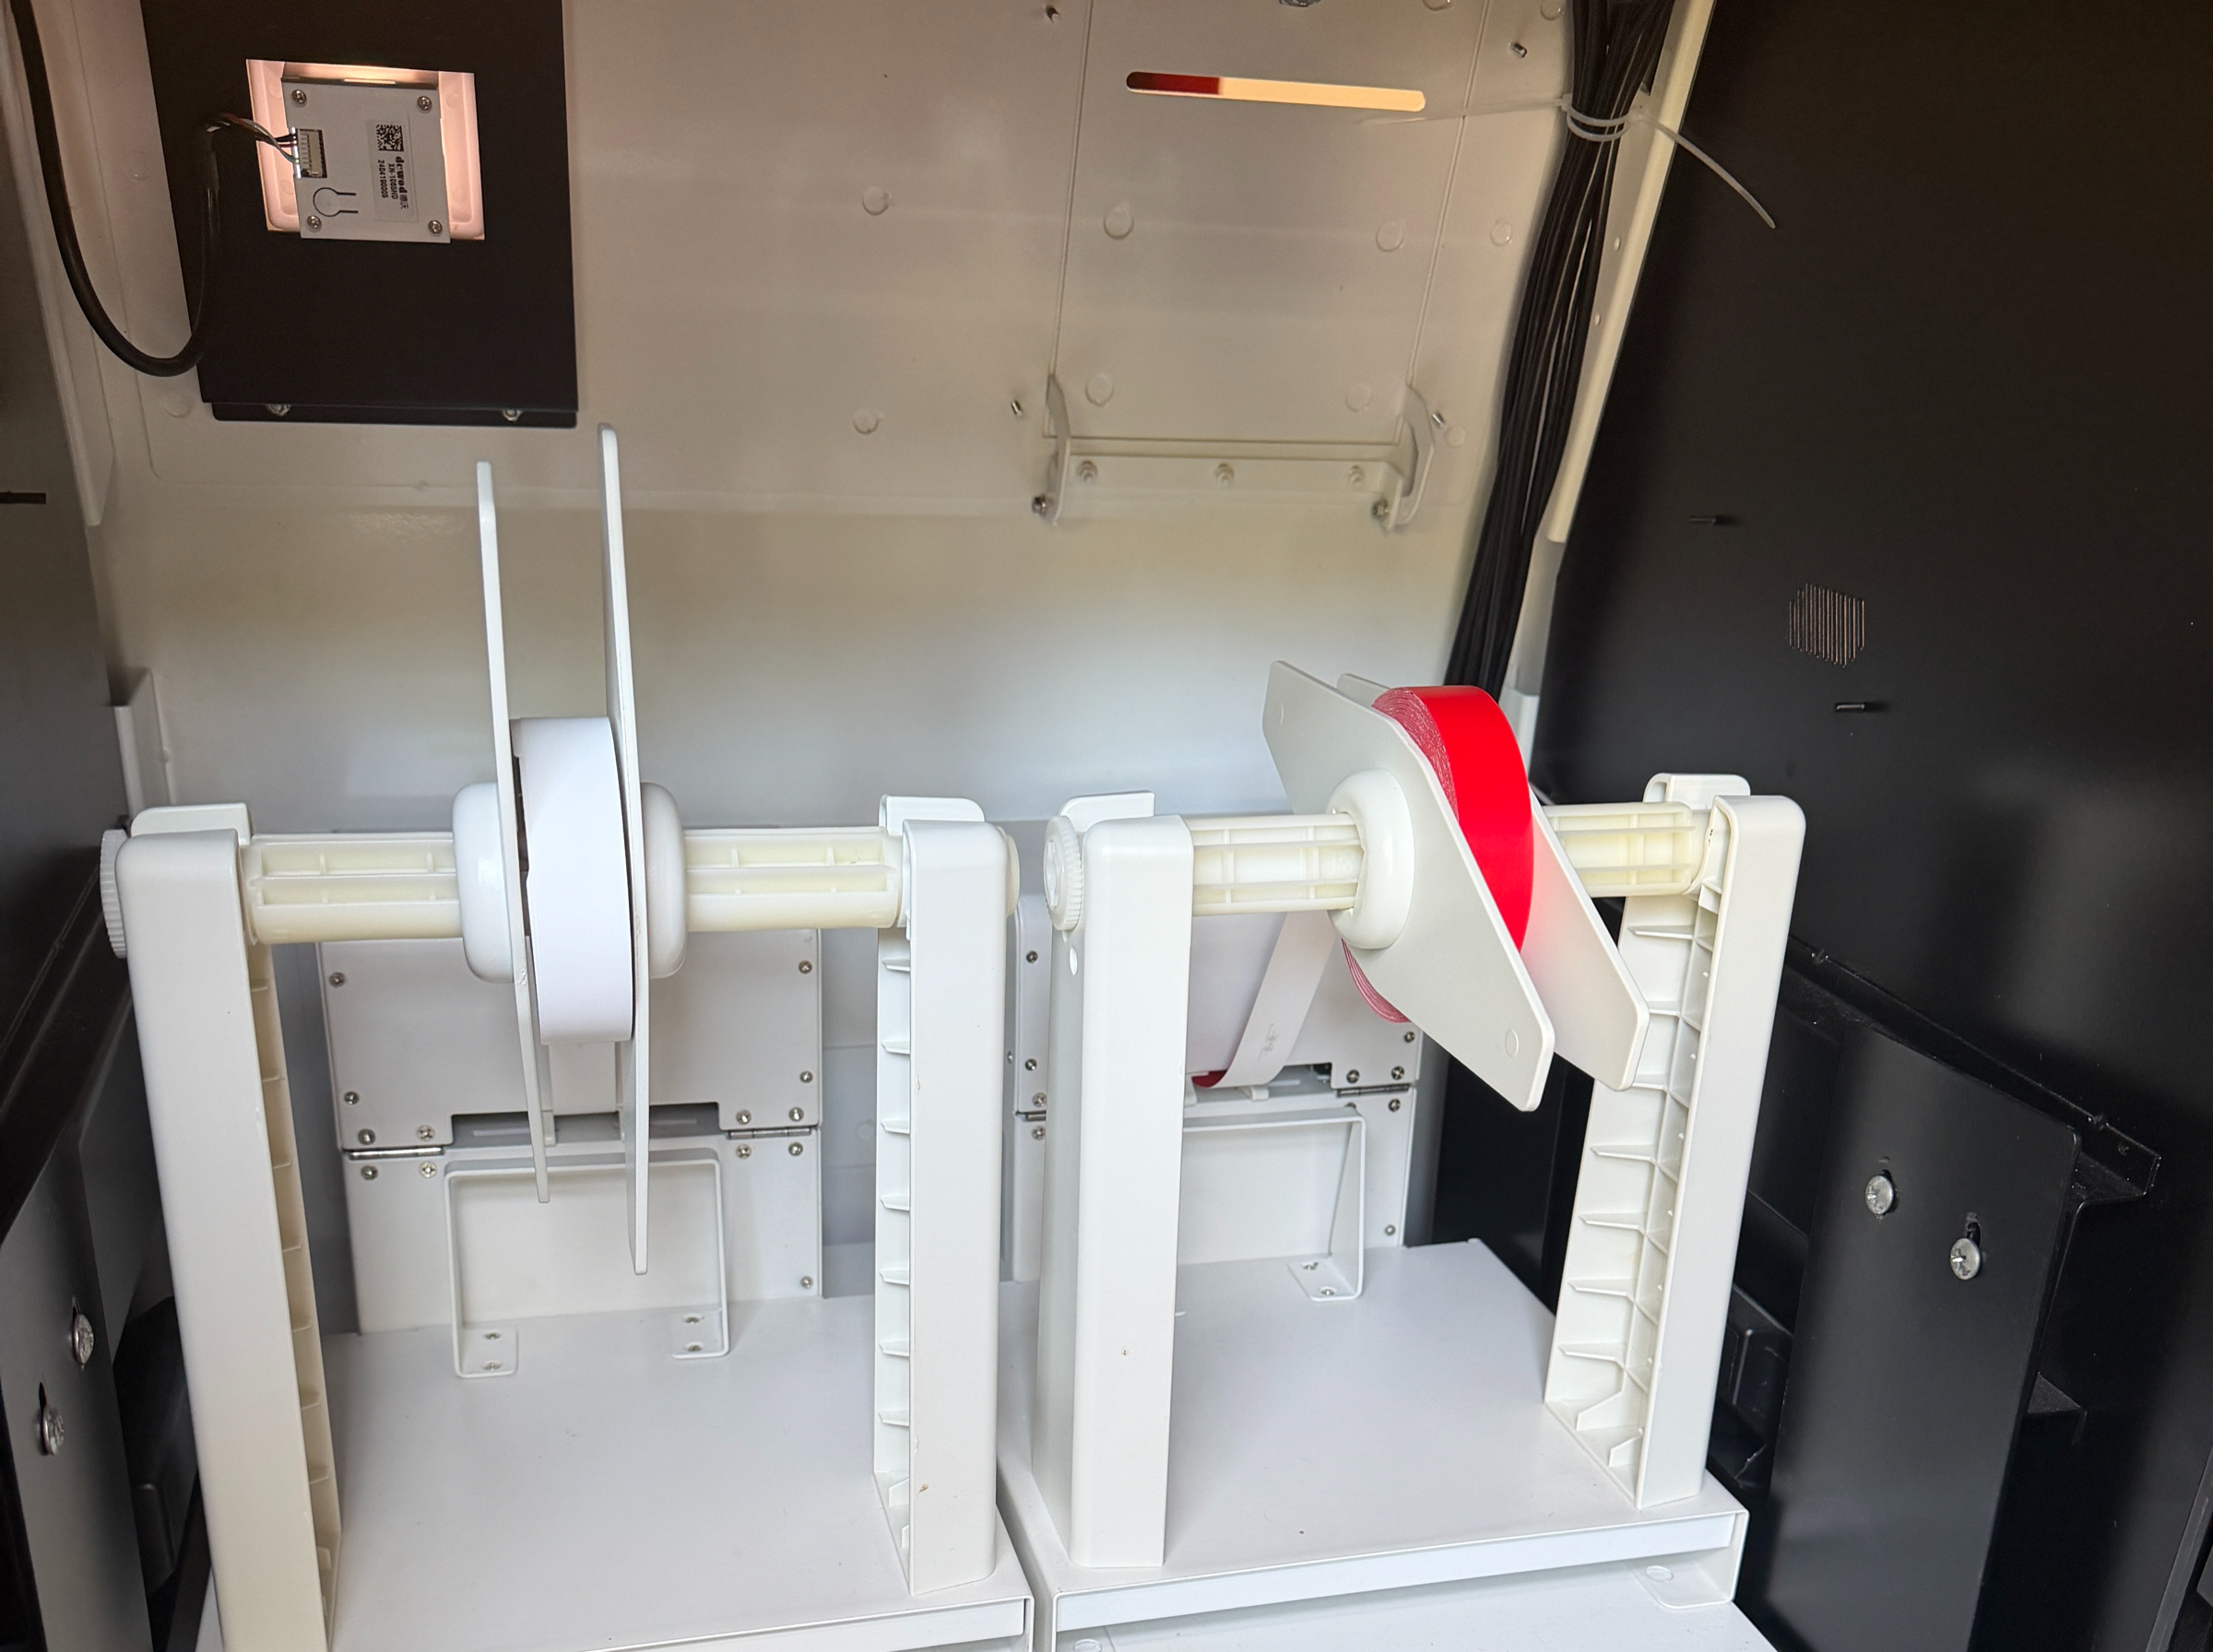
Inside the door. Printer A is on the left, facing the back. Red on A, white on B.
- 1Open the door. Slide the guide disc off, drop the roll on the spindle so the band feeds off the front and down into the printer, slide the disc back snug.
- 2Hold the gear on the kiosk → Manage Rolls. Add your colors and roll counts.
- 3Pick tonight's color when you choose the event.
09Set up
Name it. Print a test.
First launch asks three things.
- 1Name it. Where it lives: Main Gate, Pit Gate, Turn 4. The name is how this kiosk shows up everywhere else in Pit Pay — your dashboard, reports, text alerts, and alongside any other kiosks, handheld wristband printers, or scanners you run. Pick something a new gate worker understands.
- 2Confirm Wi-Fi. You connected in step 05, so this screen just shows the network and signal. Check it reads Strong and continue.
- 3Which printer is A? The kiosk prints one blank band. Tap the side it came out of. Printer A does most of the work from then on; B is the backup and the second-day roll.
- 4Finish setup. That's it — the kiosk lands on Choose Your Platform, where every race day starts. Change the name or re-run the printer test any time from the gear.
10Go live
Setup's done. From here it's race day.
Every event starts the same way.
- 1Pick a platform — Pit Pay or Ticket Hoss. Same kiosk, same bands.
- 2Log in — your mobile number and the six-digit code we text you.
- 3Pick the event — today's is first. Next you'll pick tonight's band color and test the scanner.
11Colors & test
Load a color. Print one.
After the event, the kiosk asks which color each printer is loaded with. Then test each printer.
- 1Pick a color for each printer — tap the card, choose the color on the spindle, tell it how many bands are on the roll. A is the primary; B is the backup, or day two's color.
- 2Hold the gear (bottom-left, about a second) for operator controls. Fans never see it.
- 3Test print each printer before gates, after a jam, and after every roll change.
Ticket-type colors, inventory and reprints are in the Race day guide and the Reference.
12Scanning opens
Now, or at a set time.
Once colors are loaded the kiosk asks when to open. Set a time and it counts down, then opens itself.
- 1Start scanning now — gates are open, go live.
- 2Or set a time. Defaults to gate time; nudge it 15 minutes at a time. Tap Show countdown.
- 3Countdown. Nothing prints until the minute. Line's early? Hold the gear → Start scanning this event now.
- 4Scan mode. Fans hold their phone to the eye below the screen. A band prints in about seven seconds.
Where to next
Setup's done. Everything else lives here.
Need a human? Text 855-748-1290 during event hours.
Kiosk · powered by Pit Pay